Advertiser Disclosure

Everything You Need to Know About Exterior House Painting

Proud woman painting garden house.
Guido Mieth/ Getty Images

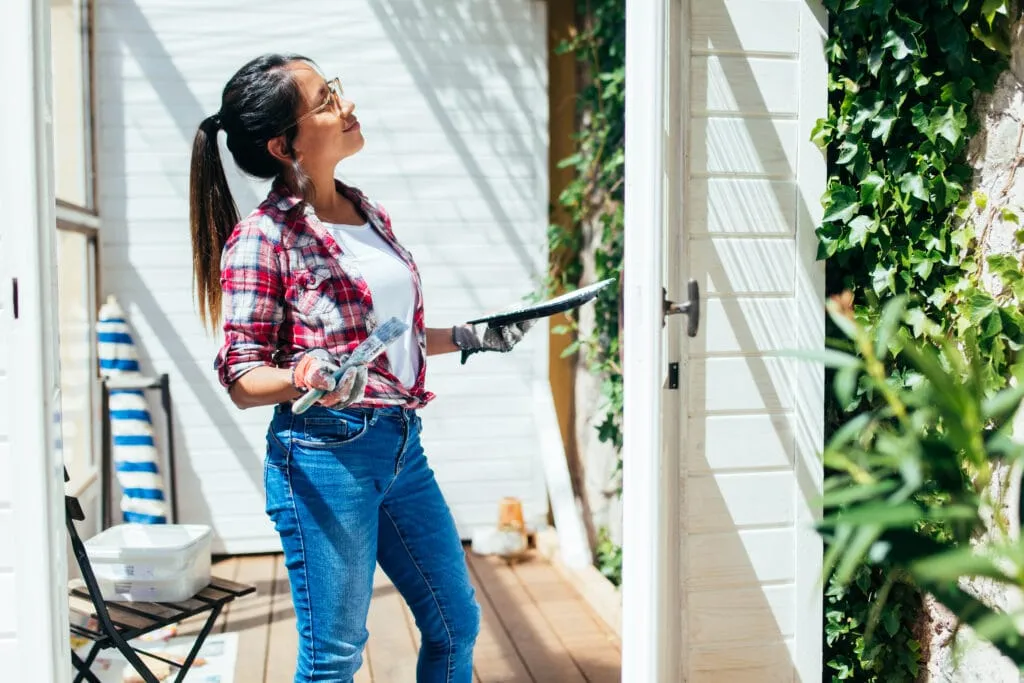
Does the outside of your home need a bit of a refresh? House painting can do wonders for your curb appeal! We’ve got you covered with our essential guide packed with everything you need to know about exterior home painting.

Should I do the exterior painting work myself or hire the pros?

There are quite a few factors to consider before making the final decision on who will paint your home. The questions below will help you weigh both the pros and cons with an open mind — from cost and equipment to safety and size.

7 questions to ask yourself when deciding who should do the painting work:

1. When was my home built?

If your home was built before 1978, the Environmental Protection Agency (EPA) requires your exterior paint to be checked for lead. Lead-based paint is toxic and the leading cause of lead poisoning. If your home tests positive for lead, the EPA recommends hiring a lead-safe contractor.

2. What’s the exterior material of my home?

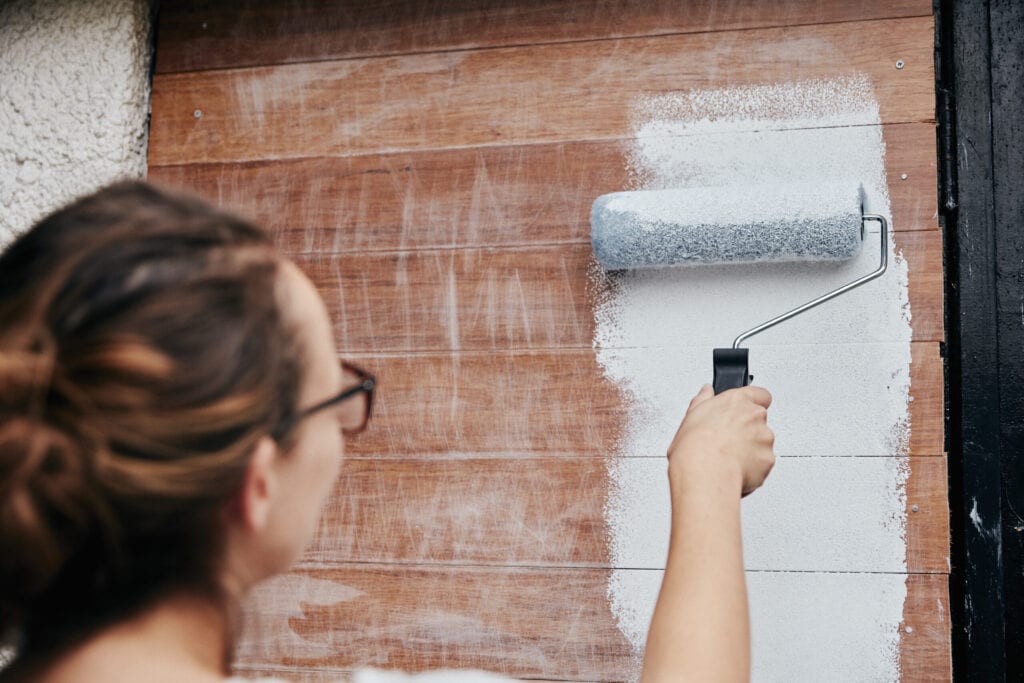
The material of your home’s exterior dictates your overall house painting approach. This includes taking care of repairs and calculating the amount of paint needed. For example, does your aluminum siding have dents or excessive “chalking” (a powdery coating)? Is your vinyl siding buckling? How much paint will you need for porous surfaces such as brick or stucco? Understanding the potential challenges upfront will aid in your decision about who will do the painting work.

3. What’s the overall size of my home?

Painting the exterior of a 600 square-foot tiny home can be a much easier task than taking on a 3,000 square-foot, two-story home. Take your home’s size into account as you assess the home painting project’s time and labor.

The size will also affect how much primer and paint you’ll need to purchase. As a reference, one gallon of any Behr paint will cover approximately 250 to 400 square feet (one coat). Your home will most likely need two coats, especially if you’re choosing a darker color.

4. If my home is a two-story, will I safely reach the second level?

Safety is key in any house painting project. Two- (or more) story homes can pose a safety risk for inexperienced DIY painters with inadequate tools to complete the painting work safely. A DIY paint project is no longer worthwhile if you accidentally topple off a ladder.

5. Do I have the necessary equipment?

Exterior house painting requires quite a few tools, including paint brushes, rollers, paint scrapers, drop cloths, and an extendable ladder. The cost of these items can quickly add up, so take a complete inventory of what you have on hand and what you’ll need to buy or rent.

6. What is the overall cost for DIY exterior home painting versus hiring a professional?

Cost plays a role in any home improvement project, including house painting. To determine what’s most economical, you should get at least three professional exterior home painter quotes that include a detailed explanation of what’s part of the contract.

Then it’s time to research the overall cost to DIY. This includes estimating how much it will cost you to complete exterior repairs, purchase the necessary amount of paint, rollers, brushes, and rent equipment such as power washers and ladders. Once you’ve priced out the total DIY cost, assess which route is most cost-effective.

7. Do I have enough time for exterior home painting?

Your time is valuable, and painting can take a considerable amount of time. Is your work or personal schedule jam-packed? Does your job require you to travel away from home often? If you just bought a new house, painting the exterior could hinder your unpacking efforts and settle in. Fitting such a big project into a schedule that has little downtime can be challenging.

You can consider a DIY house painting project if…

You have the time, ability, resources, and help to get the job done quickly and safely. If you’re looking to save money (and deep dive into a DIY project), you should consider tackling the house painting project yourself. Keep in mind that DIY paint projects are best for homes with little to no prep or repair work.

But make sure you assess the full scope of the project (and get free quotes from painting professionals) before you take the leap.

You should hire a professional to paint your house if …

Sometimes it’s best to leave such a major project to the professionals, especially if you lack the time, skills, or ability to paint your home’s exterior properly. Selling your house? If an exterior paint refresh is part of your presale home improvement agenda, hiring a painting pro eliminates that added stress as you prepare to list your home.

Ready to hire a professional? Your next step is to choose a painter. Avoid selecting a painter based on price alone. Be sure to confirm the project length, the number of workers on the job, if the painter is licensed and insured, and what prep and clean up work will be completed by the paint company.

Pro tip: If your community has a social media page, ask for recommendations, and do a “drive-by” to see the completed job in person.

A woman using a paint roller, painting wooden planks on a wall.

Mint Images/ Getty Images

If you do decide to DIY, follow these 14 house painting steps:

Step 1: Give your home’s exterior a good cleaning.

Clean your home’s exterior by removing any dirt, mold, and mildew. This will ensure even distribution of primer and paint.

For this step, you’ll need: A power washer or hose, cleaning fluid, and a scrub brush.

Step 2: Remove chipped or flaking paint.

Examine your home for areas where paint has lifted, is peeling, or curling up, as you’ll need a smooth surface before you begin the paint application. Gently scrape loose paint with a wide paint scraper and a wire brush.

For this step, you’ll need: A paint scraper and a wire brush.

Step 3: Repair damage to siding and trim.

A fresh coat of paint on your home won’t look its best if there are underlying issues such as buckled siding, rotting wood, or warped trim. Complete all pre-paint repair work, including snapping loose siding into place, fully replacing wood pieces, or repairing small wood blemishes with wood putty.

For this step, you’ll need: A paintable wood putty, wood putty knives (assorted sizes), sandpaper, and an orbital sander.

Step 4: Check, repair, and recaulk seals.

Proper sealing of windows and doors prevents moisture from getting in and under your home’s exterior and causing damage.

For this step, you’ll need: An all-weather exterior sealant and a caulking gun.

Step 5: Choose your paint color and sheen.

Your options are unlimited when choosing your home’s new paint color. Whether you match the color to your home’s style or personality, the correct paint sheen will need to be based on the surface of your home. For example, Sherwin-Williams recommends a satin sheen for trims and a flat, matte finish for siding.

For this step, you’ll need: Paint swatches and paint samples.

Step 7: Purchase primer and paints.

It’s essential to properly calculate the amount of primer and paint you’ll need to complete your home. Avoid under or overestimating by using Benjamin Moore’s online paint calculator.

For this step, you’ll need: Primer and exterior paint.

Step 8: Gather paint supplies.

Ensuring you have all necessary paint supplies at the ready is an important step in the DIY process. After checking what materials you have on hand, purchase or rent any outstanding supplies.

For this step, you’ll need: Brushes, paint rollers and frames, paint sprayer, drop cloths, telescoping ladder, paint bucket, painter’s tape, and paint trays.

Step 9: Protect surrounding areas.

As careful as you may be, there most likely will be a few spills during the painting process. Cover patios, decks, landscaping, and walkways to keep spills at a minimum.

For this step, you’ll need: Drop cloths, plastic sheeting, and twine.

Step 10: Apply primer.

Skip this step if you’ve chosen an exterior paint and primer combination. 

Plan your house painting around clear weather as your home’s surface needs to be completely dry, so the primer and paint adhere properly. Choose a day that has a relative humidity of around 50% with temperatures that remain consistent.

Applying primer ensures the paint properly adheres to your home’s exterior.

For this step, you’ll need: Exterior primer, a paint bucket, a paint sprayer, a brush, and a roller.

Step 11: Apply the first coat of paint.

It’s been a long journey! You’re finally ready to apply the first coat of paint. Start from the highest point of your house, applying the paint in straight, even strokes that follow the layout of your siding (vertical strokes on vertical siding and horizontal strokes on horizontal siding). Remember — less is more during house painting as a thick, heavy hand may cause drips or uneven application.

For this step, you’ll need: Exterior house paint, a sprayer, paintbrushes, and rollers.

Step 12: Apply the second coat of paint.

Allow your first coat of paint to dry completely. According to Behr, you’ll need to wait at least two hours in between coats. Don’t be tempted to reuse paint-covered brushes or rollers. Start fresh to ensure your second coat goes on as smoothly as the first.

For this step, you’ll need: New rollers, a cleaned paint sprayer, and brushes.

Step 13: Tape and paint all trim.

Now that your exterior is looking fantastic, it’s time to refresh door frames, windows, window wells, pillars, and other trim work. Choose a mold and mildew resistant exterior trim paint in a satin sheen.

For this step, you’ll need: Painter’s tape, trim paint, and brushes.

Step 14: Clean up.

Before you stand back and marvel at this huge DIY accomplishment, you’ll need to clean up the worksite. Remove painter’s tape, scrape any paint off of windows, and clean tools and brushes. Seal paint cans by cleaning the inner ring, placing the lid back on the paint can, and gently hammering around the lid’s perimeter with a rubber mallet.

Avoid storing paint in places that experience extreme high or low temperatures. If you need to dispose of leftover primer or paint, contact your local township or county for proper disposal guidelines.

For this step, you’ll need: Contractor-grade trash bags, a utility knife, and paint clean up wipes.

If you decide to hire a professional painter, here’s what you can expect to pay:

According to Fixr.com, the national average for a 1,500 square-foot house is $5,170 (including minor prep work). Pricing fluctuates based on the type of siding on your home. For example, a 1,500 square-foot home with engineered wood would cost between $1,500-$2,000, while a stucco home comes in much higher at $4,800-$6,500.

Keep in mind that pricing will vary based on the cost of materials and labor where your home is located. Get at least three quotes to ensure you’re getting optimal services at a competitive price.

How to maintain exterior house paint:

Ensuring your home’s exterior looks freshly painted is possible with a bit of maintenance work. Keep the exterior clean with an annual power washing, regularly prune landscaping trees or shrubbery that could scratch or scrape the exterior, and touch up any damaged areas immediately. Avoid clogged gutters and downspouts as the overflow of water can damage a home’s exterior.

The bottom line

Armed with these facts on exterior house painting, you’ll be able to make the right decision on the best way to complete the project.

Frequently asked questions

How much does it cost to get the outside of your house painted? 

The total cost of exterior house painting is based on several factors. This includes location, square footage, price of paint per gallon, and condition of the exterior.

How do I prepare the exterior of my house for painting? 

For paint to be applied properly and evenly, your home’s exterior will need to be clean and dry. Plan to power wash, remove any flaking paint, repair loose wood or siding, and sand uneven surfaces before painting.

What is the best paint to use on the outside of a house? 

The best exterior paint for your home is one that maintains its color and protects against outdoor elements such as moisture and sun damage.

What is the best time to paint my home exterior? 

The best time to paint your home’s exterior will depend on your location. Choose a month when the temperatures are above 50 degrees Fahrenheit and do not drop below 35 degrees Fahrenheit in the evening. Weather fluctuations can cause dew to form on the exterior and prevent the paint from drying properly.


Related Articles

Ask a Sleep Expert: How to Get a Good Night’s Sleep During a Move

Moving can be one of the most stressful life experiences a person can go through. And during the moving process, some of us may find it more difficult to get a good night’s sleep.  To get a better understanding of how the moving process can affect a person’s sleep quality, we spoke with Nationally-Board Certified […]

Read More
New Year, New Home: Five Recipes for Your Year of Firsts

This is paid content. It was written and produced by MYMOVE in partnership with Home Chef. Whether you love to cook or you struggle to put together a PB&J, the moving process will have the best of us scrambling to put something edible on the table. That’s why meal delivery services like Home Chef are […]

Read More
MYMOVE Gift Guide: Everything You Need to Crush Your Goals for 2023

The products featured here are independently selected based on thorough research from our editorial team. If you buy something through links on our site, we may receive a commission. The holidays are a time for resting and connecting with people you love, but it’s also a great opportunity to look forward to the year ahead. […]

Read More